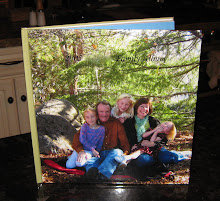
- Take Photos
This may sound obvious, but we've all been in situations when we've wished we had our camera and we've left it at home. Get a good, compact digital camera and carry it everywhere you go. (I like the Canon Digital Elph Series.) Keep it in your purse, diaper bag, briefcase or pocket. You'll always be ready to take photos and even digital movies when those unexpected precious moments present themselves. - Download Your Digital Photos onto Your Computer
Put your photos in a labeled folder such as "2008 July". Use good organizing/editing photo softare to help you as you first screen your photos. (I like Picasa which is free and easy to download.) Correct red-eye, add fill light to underexposed photos and delete those that are beyond repair. You can also "star" the photos you like best. Make sure you back up your photos to avoid heartache if your computer's hard drive crashes. - Decide What Your Photo Album will Cover
For your first photo book, choose something that's recent and that you're excited about. It could be the memories and photos from your last vacation, a family album that covers the past year, or it could be focused on one person in your family. It could even be a family recipe book that includes family photos and everybody's favorite recipes. If you're excited about it, you'll enjoy putting it together. - Upload Your Photos
Choose a photo book printing service and sign up. (We like Shutterfly.com for its pricing, options, and quality.) You can upload the photos that are relevant for your photo book. (Using Picasa, upload photos by marking each photo with "hold" and then use the "Order Prints" option at the bottom. It will give you options for different sites with Shutterfly.com as one of the choices.) - Have Fun Creating Your Photo Book
Choose the size of photo book you want and start your project. Use the "Add Pictures" option at the bottom to retrieve your uploaded photos from the album you set up. Drag and drop your photos onto the photo book pages. It's helpful to check the box "hide used photos". Experiment with different formats, backgrounds, and borders. Anything can be changed up until the time you place your order. - Don't Forget the Written Part of the Photo Book
One of the best advantages of the photo book is that you can easily type in your photo captions, stories, and journal excerpts. Years from now you may forget what the photo was about, but your written story will preserve the memory. You can use different fonts, type sizes and colors to enhance the look of your photo book.
It's best to write down your memories when they're fresh. As you come home from a trip, take a few moments to write down special memories, highlights, lowlights,and quotable quotes. Have everyone in the family contribute their thoughts to the photo book. - Review, Revise, and Double-check - Then do it Again
The last thing you want is a photo book with spelling errors and a misplaced photo. Unlike traditional photo scrapbooks, it's fast and easy to make corrections. Don't rush the editing process. You'll be happy to have a photo book that you're proud of. - Order Your Photo Book and Enjoy for Years to Come. Consider whether it would be good to order multiple copies so that your youngsters can have their own copy when they grow up and leave the nest. A set of photo books might be a wonderful gift for the future.
Tuesday, July 29, 2008
Eight Easy Steps to a Digital Photo Album
Subscribe to:
Post Comments (Atom)


No comments:
Post a Comment